By Keshav Khatore
| Jul 9, 2020 | In
Articles
| Total Views [ 2034 ]
Amazon Elastic Kubernetes Service
Amazon Elastic Kubernetes Service (Amazon EKS) is a fully managed Kubernetes service. Customers such as Intel, Snap, Intuit, GoDaddy, and Autodesk trust EKS to run their most sensitive and mission-critical applications because of its security, reliability, and scalability.
Nextcloud
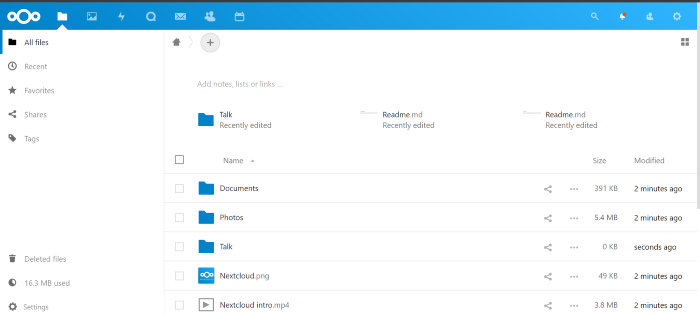
Nextcloud is a suite of client-server software for creating and using file hosting services. Nextcloud is free and open-source, which means that anyone is allowed to install and operate it on their own private server devices.
Pre-requisite
- AWS account
- AWS CLI
- eksctl
- kubectl
This software has to be downloaded from the internet and the path has to be added to the system variables.
- First, we need to create a Kubernetes cluster on AWS using EKS. There a three ways to do that but, we’ll be using the CLI option. You’ll need an IAM user with Administrator Access or the root user.
- Open Command Prompt on Windows OS or any other equivalent program depending on which OS you are using.
aws configure
Use this code and enter the user details along with the region id to login to AWS using CLI.
3. Now we can create the Kubernetes cluster. Create a cluster.yml file that boasts the following code.
Cluster.yml
|
apiVersion: eksctl.io/v1alpha5
kind: ClusterConfig
metadata:
name: mycluster
region: ap-south-1
nodeGroups:
— name: ng1
desiredCapacity: 2
instanceType: t2.micro
ssh:
publicKeyName: keycloud
— name: ng-mixed
minSize: 1
maxSize: 3
instancesDistribution:
maxPrice: 0.017
instanceTypes: [“t2.micro”] # At least one instance type should be specified
onDemandBaseCapacity: 0
onDemandPercentageAboveBaseCapacity: 50
spotInstancePools: 2
ssh:
publicKeyName: keycloud
|
This cluster configuration file will create 2 node groups namely ng1 and ng-mixed. To start creating the cluster execute the cluster.yml file.
eksctl create cluster -f cluster.yml
The cluster building process will take some time to finish.

4. Once the cluster is created update the kubeconfig file
aws eks update-kubeconfig --name mycluster

View your Kubernetes config file using
kubectl config view
5. We shall now create the mariadb_deploy.yml file. The file consists of 3 parts- Service, PVC, and Deployment. The deployment consists of the replica set, container specifications, and image details. The PVC will create a request for a persistent volume of size 1GiB. This persistent volume uses EBS( Elastic Block Storage) to store the data. The volume is mounted to the “/var/lib/MySQL” folder since it stores all the data. The last part is the Service. Service
mariadb_deploy.yml
|
apiVersion: v1
kind: Service
metadata:
name: nextcloud-mariadb
labels:
app: nextcloud
spec:
ports:
- port: 3306
selector:
app: nextcloud
tier: mariadb
clusterIP: None
---
apiVersion: v1
kind: PersistentVolumeClaim
metadata:
name: mariadb-pv-claim
labels:
app: nextcloud
spec:
accessModes:
- ReadWriteOnce
resources:
requests:
storage: 1Gi
---
apiVersion: apps/v1
kind: Deployment
metadata:
name: nextcloud-mariadb
labels:
app: nextcloud
spec:
selector:
matchLabels:
app: nextcloud
tier: mariadb
strategy:
type: Recreate
template:
metadata:
labels:
app: nextcloud
tier: mariadb
spec:
containers:
- image: mariadb:latest
name: mariadb
env:
- name: MYSQL_ROOT_PASSWORD
valueFrom:
secretKeyRef:
name: mariadb-pass
key: password
- name: MYSQL_USER
value: chirag
- name: MYSQL_PASSWORD
valueFrom:
secretKeyRef:
name: mariadbuser-pass
key: password1
- name: MYSQL_DATABASE
value: mydb
ports:
- containerPort: 3306
name: mysql
volumeMounts:
- name: mariadb-ps
mountPath: /var/lib/mysql
volumes:
- name: mariadb-ps
persistentVolumeClaim:
claimName: mariadb-pv-claim
|
6. Since we have created the file for the database, we shall now create the nextcloud_deploy.yml file. Almost the basic structure of the 3 parts remains the same except for a few tweaks. The Service acts as a load balancer and exposes the setup to the outside world.
nextcloud_deploy.yml
|
apiVersion: v1
kind: Service
metadata:
name: nextcloud
labels:
app: nextcloud
spec:
ports:
- port: 80
nodePort: 30001
selector:
app: nextcloud
tier: frontend
type: LoadBalancer
---
apiVersion: v1
kind: PersistentVolumeClaim
metadata:
name: nextcloud-pv-claim
labels:
app: nextcloud
spec:
accessModes:
- ReadWriteOnce
resources:
requests:
storage: 1Gi
---
apiVersion: apps/v1
kind: Deployment
metadata:
name: nextcloud
labels:
app: nextcloud
spec:
selector:
matchLabels:
app: nextcloud
tier: frontend
strategy:
type: Recreate
template:
metadata:
labels:
app: nextcloud
tier: frontend
spec:
containers:
- image: nextcloud:latest
name: nextcloud
env:
- name: MYSQL_ROOT_PASSWORD
valueFrom:
secretKeyRef:
name: mariadb-pass
key: password
- name: MYSQL_PASSWORD
valueFrom:
secretKeyRef:
name: mariadbuser-pass
key: password1
- name: MYSQL_USER
value: chirag
- name: MySQL_DATABASE
value: mydb
ports:
- containerPort: 80
name: nextcloud
volumeMounts:
- name: nextcloud-ps
mountPath: /var/www/html
volumes:
- name: nextcloud-ps
persistentVolumeClaim:
claimName: nextcloud-pv-claim
|
7. Now both the mariadb_deploy.yml and nextcloud_deploy.yml has been created. We shall now create the kustomization.yml file as it lets us deploy the whole setup with just one command and a few other functionalities.
kustomization.yml
|
apiVersion: kustomize.config.k8s.io/v1beta1
kind: Kustomization
secretGenerator:
- name: mariadb-pass
literals:
- password=redhat
- name: mariadbuser-pass
literals:
- password1=redhat
resources:
- mariadb_deploy.yml
- nextcloud_deploy.yml
|
8. Deploy the whole setup using this command.
kubectl create -k .
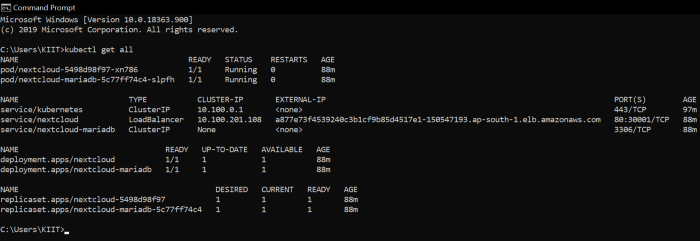
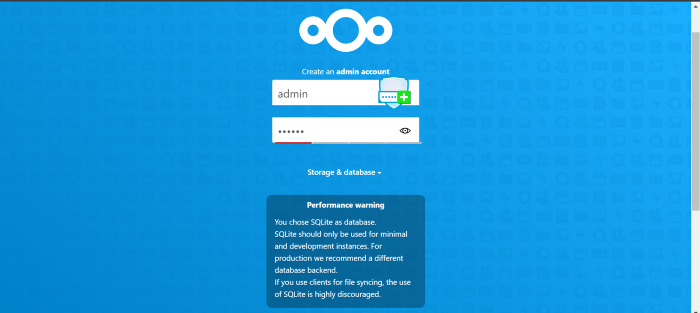
The sign Page login it with Credential
9. We have just launched Nextcloud on AWS using EKS.