


Cloudera, Inc. is a US-based software company that provides a software platform for data engineering, data warehousing, machine learning and analytics that runs in the cloud or on-premises.
Prerequisite:
At least 12GB+ RAM ( 4GB+ for operating system & 8GB+ for Cloudera), although 16 GB+ is preferred. 100GB Hard Disk. Cloudera runs on CentOS, which is the community edition of the Linux. Windows system must support 64-bit.
Step 1
Download VirtualBox for Windows from https://www.virtualbox.org/wiki/Downloads
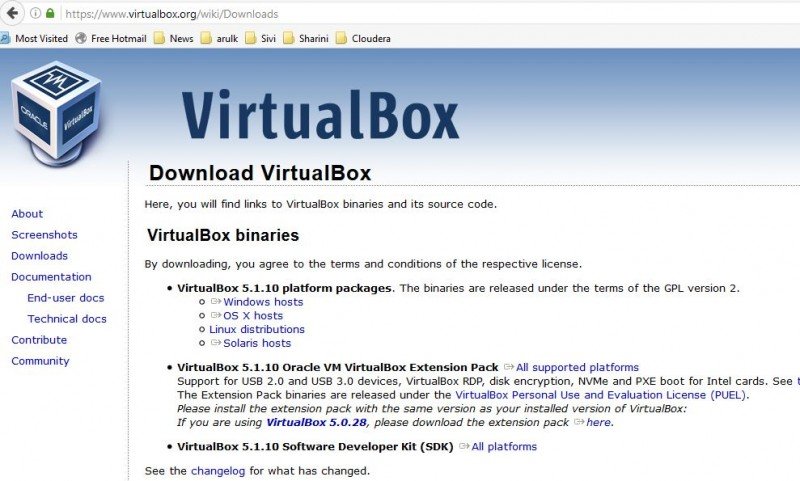
Step 2: Install “VirtualBox-5.1.10-112026-Win.exe”.
Install Cloudera for VirtualBox
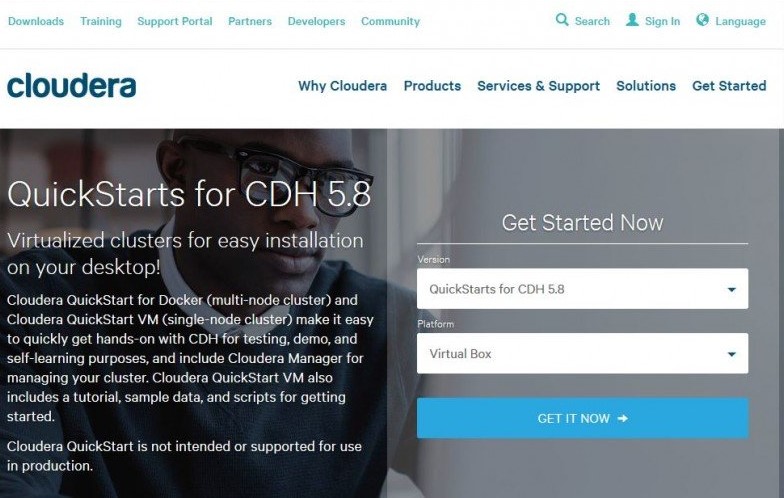
Step 3: Go to http://www.cloudera.com/downloads.html
download the “QuickStarts” click on “Download Now”.
Step 4: Extract the download “Cloudera-quickstart-VM-5.8.0-0-virtualbox.zip”. The extracted zip should have the “Cloudera-quickstart-VM-5.8.0-0-Virtualbox-disk1.vmdk“.
Configure Virtual Box And Cloudera
Step 5: Open the VirtualBox, and create a new VM.

Step 6: Configure the RAM for VirtualBox

Step 7: Add the Cloudera “Cloudera-quickstart-VM-5.8.0-0-Virtualbox-disk1.vmdk” that was previously downloaded and extracted

Step 8: Click on “Settings”, and give more CPU cores if you have and enable the “bidirectional” drag/drop feature.

PowerOn the VM “Cloudera-5.8” that you had just added by double-clicking on it, and it will take some time to launch.

Step 9: Minimize the browser and Launch Cloudera Express on the Desktop. This requires at least 8 GB of RAM and at least 2 virtual CPUs

Step 10: It will take some time to start as per the system configuration that you have set.

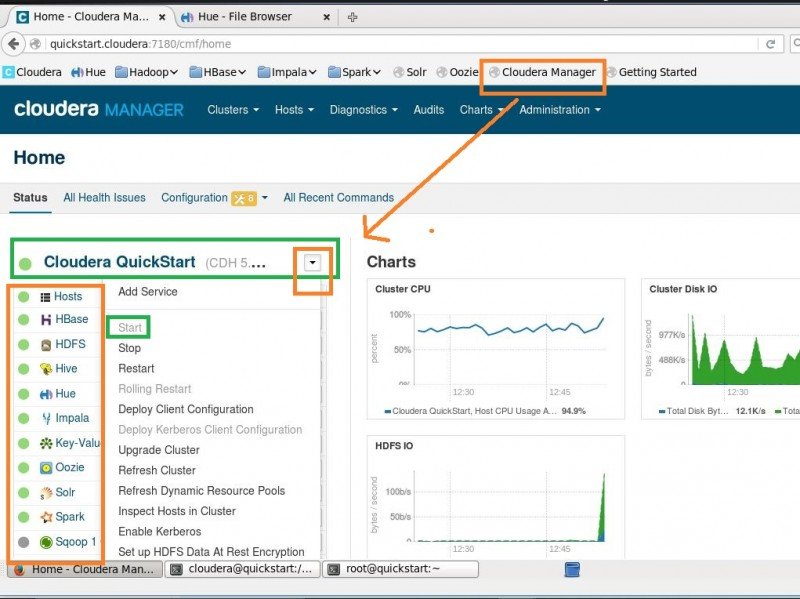
and once started, you can log in via the browser with http://quickstart.cloudera:7180/cmf/login into the “Cloudera Manager”
username: cloudera
password: cloudera
Step 11: Make sure that the relevant services are started, and if not start them as per the use.
Hope You Guys Like The Article

![]()
![]()
![]()
![]()
![]()
![]()